Sphero Edu Managed ConfigurationsUpdated 2 months ago
What are Managed Configurations?
Managed configurations allow you, as an IT admin, to modify various aspects of the Sphero Edu app on deployment. This will ensure that you can create a more focused experience for students, or comply with specific district rules and directives.
Here are some examples when setting managed configurations may be valuable:
- Your students use 1 to 1 Chromebooks in classes. The teachers roster and create accounts through Google Classroom sync. Since you only want them to be able to sign in with Google SSO, and since their accounts are automatically rostered, you want to disable all other sign in options and you want to block access to the account creation flows. Managed configurations will allow you to do so.
- Your district has a policy that students should not have access to any community created content - only content created by the application developer or by teachers. Since that's the case, you want to disable the Sphero Edu "community activities" section of the app. Managed configurations will allow you to do so.
Android Managed Configurations
Below are all the specific, supported managed configurations for the Android version of Sphero Edu.
Configuration Title: | JSON Key: | Type: | Values: | Default Setting: | Description: |
Account Creation | "account_creation" | Boolean | true, false | true | Enables/disables the button on the sign in screens that would allow users to create accounts |
Class Code Sign In | "class_code_sign_in" | Boolean | true, false | true | Enables/disables signing in with class codes |
Clever Sign In | "clever_sign_in" | Boolean | true, false | true | Enables/disables signing in with Clever accounts |
Google Sign In | "google_sign_in" | Boolean | true, false | true | Enables/disables signing in with Google accounts |
Standard Account Sign In | "standard_account_sign_in" | Boolean | true, false | true | Enables/disables signing in with standard Sphero accounts (email/username/password) |
Getting started toggle in settings | "getting_started_toggle" | Choice | force on, force off, allow user control | allow user control | Allows precise control of the "getting started" activities setting in the settings screen |
Find my Robot toggle in settings | "find_my_robot_toggle" | Choice | force on, force off, allow user control | allow user control | Allows precise control of the "find my robot on connection" setting in the settings screen |
Activity TTS toggle in settings | "activity_tss_toggle" | Choice | force on, force off, allow user control | allow user control | Allows precise control of the "activities text-to-speech" setting in the settings screen |
Community Activities Tab | "community_activities_tab" | Boolean | true, false | true | Enables/disables the "community activities" tab |
Examples of Formatting
Managed configurations are entered as JSON formatted keys. Here is an example of the formatting if you wanted to disable account creation and disable all sign in options with the exception of Google SSO:
1 {2 "account_creation": false,3 "class_code_sign_in": false,4 "clever_sign_in": false,5 "standard_account_sign_in": false6 }
Another example. Perhaps you want to disable the "Community Activities" tab, and nothing else:
1 {2 "community_activities_tab": false3 }
For configurations with choices, you will need to correctly enter the specific key value you want. For example:
1 {2 "getting_started_toggle": "force off",3 "find_my_robot_toggle": "force on",4 "activity_tss_toggle": "allow user control"5 }
Deploying Managed Configurations in Google Admin
- Start by following the steps for general deployment of Android apps, as documented here.
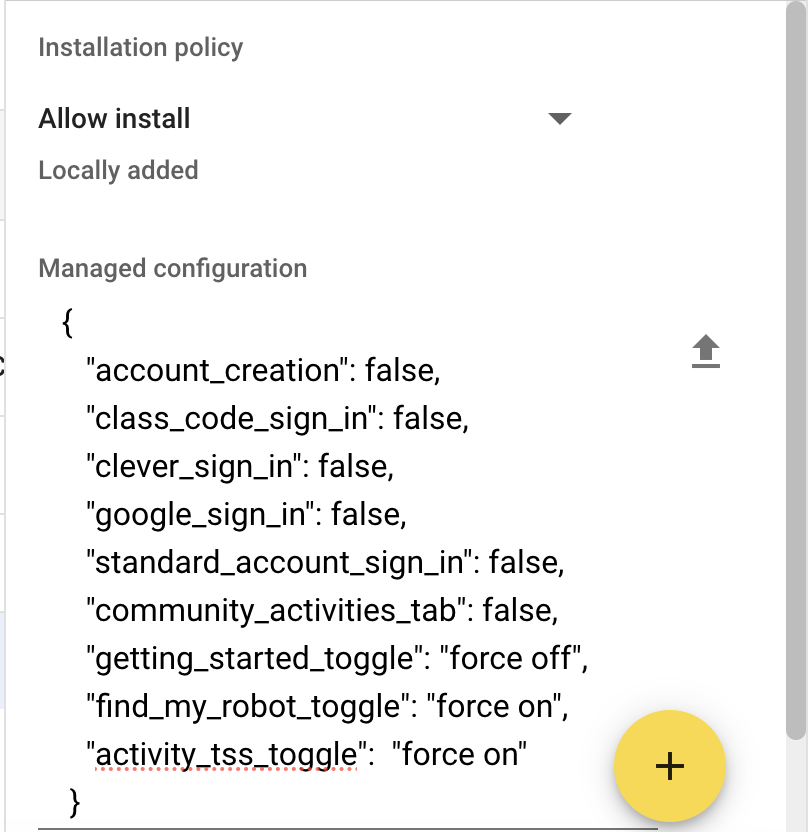
- When the deployed app is selected, there will be a section to the right for managed configurations. You can directly type in the keys and values, as needed:
- Make sure to save the changes! Otherwise the configuration changes will not be applied.